Upload and Organize Assets
Use the Assets workspace to build a reusable image library before or while creating cards. The uploader accepts PNG, JPEG, and WebP images and can process several files in one batch.
Upload one or more images
- Open Assets from the left navigation.
- Choose Upload.
- Select one or more PNG, JPEG, or WebP files.
- Follow Scanning for duplicates and Processing images while the batch runs.
- If Upload review opens, check the skipped or renamed files and choose Continue to finish refreshing the library.
The successful files from the latest batch appear under Recently uploaded. A later batch replaces that temporary group, but it does not delete earlier assets.
Prepare images before upload where you can. Full-card artwork and opaque backgrounds are usually best as optimized JPEG files, while images that need transparency should stay as PNG. See Protect Your Library and Keep It Small for practical size guidance.
What happens to duplicates
The uploader checks both image content and filenames:
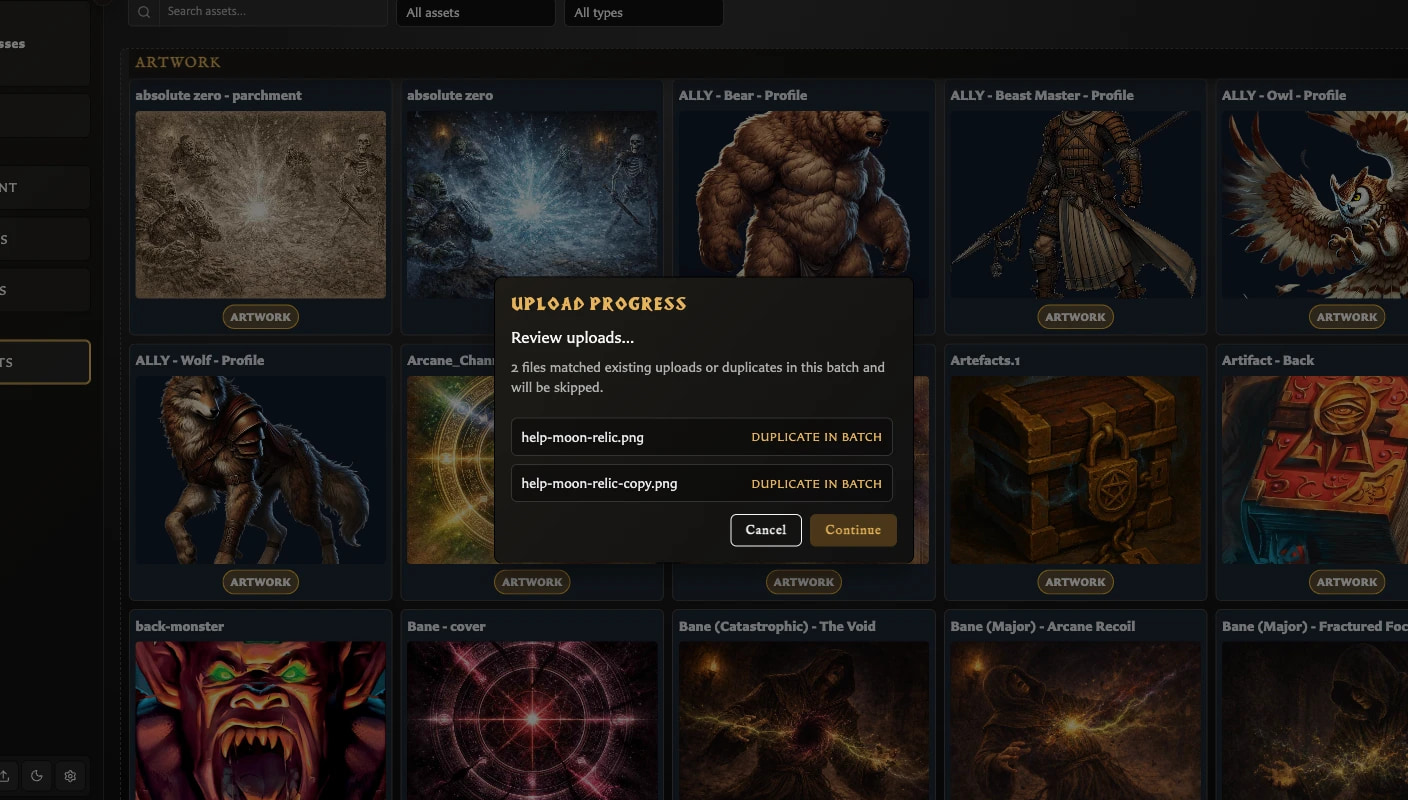
- An exact duplicate already in the library is skipped, even if the new file has a different filename.
- A different image that uses an existing filename is kept and renamed automatically, for example from
goblin.pngtogoblin (2).png.
Review the upload summary instead of repeatedly uploading a file that was skipped as Already in library.
If identical new images are selected together, v0.8.0 can skip every copy as Duplicate in batch. Upload one copy separately. Do not use Upload Review's Cancel as an undo action: accepted files have already been added, and the current action can strand the progress window. See Fix Asset Upload Problems.
Find a recent or existing image
Use Search assets by name when you remember part of the filename. Combine it with:
- All assets, Artwork, Icons, or Unclassified.
- All types or a listed file type such as
image/png.
All active controls narrow the same grid. Clear each control when troubleshooting an empty result.
Correct an image's kind
The app tries to classify each upload automatically. If an image appears in the wrong group:
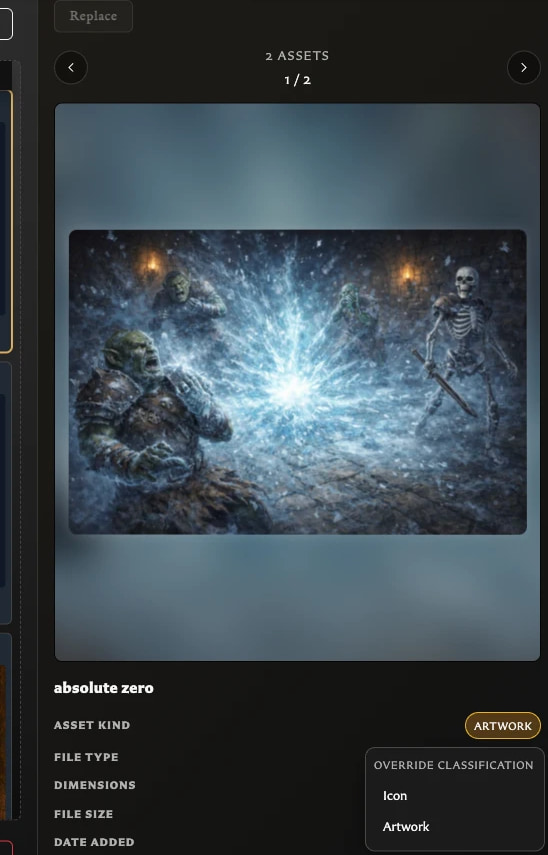
- Select the image.
- In the inspector, choose its current Asset kind.
- Under Override classification, choose Artwork or Icon.
Changing the kind affects organization and which image fields offer the asset. It does not convert, crop, or otherwise change the image itself.
Select several assets
- Hold Ctrl on Windows or Cmd on macOS and click images to add or remove them individually.
- Hold Shift and click to select a continuous range.
- Use the inspector's Previous and Next controls to review the current multi-selection.
Bulk selection is useful for deletion and review. Replace remains disabled until the selection contains exactly one asset.
Add an asset to a card
Choosing and positioning artwork is a card-editing task. See Add and Position Artwork for the complete card workflow.